Essential Toolkit for Emergency Repairs
In life, unexpected situations can arise at any moment, whether it's a leaky pipe in the middle of the night or a flat tire on a road trip. Having the right tools and supplies at your fingertips can make all the difference when it comes to handling these emergencies effectively. This article outlines the must-have tools and supplies for effective emergency repairs, ensuring you're prepared for unexpected situations at home or on the road. Think of your emergency toolkit as your personal superhero—ready to swoop in and save the day when things go awry!
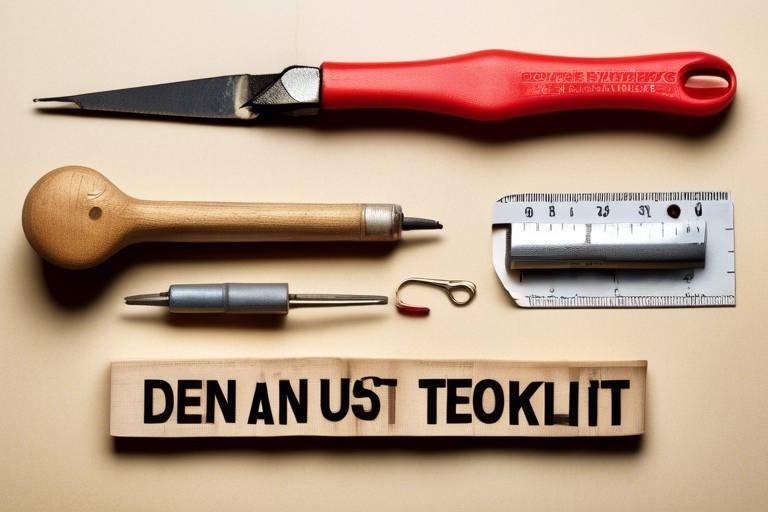
Every DIY enthusiast knows that a solid foundation is essential for tackling any repair task. Basic hand tools form the backbone of your emergency toolkit, allowing you to address a variety of issues with confidence. Imagine facing a simple task like tightening a loose screw or fixing a wobbly chair. With the right hand tools, you can resolve these problems swiftly and safely. Essential hand tools include:
- Screwdrivers: A good set of both flathead and Phillips screwdrivers is essential for loosening and tightening screws.
- Wrenches: Adjustable wrenches and socket sets can help you tackle nuts and bolts of various sizes.
- Pliers: Needle-nose pliers, slip-joint pliers, and wire cutters are versatile tools that assist in gripping, twisting, and cutting tasks.
Having these tools on hand can help you tackle a wide range of repairs, from assembling furniture to fixing appliances. They provide the foundation for handling various repair tasks efficiently and safely.
When it comes to emergency repairs, power tools can be your best friends. They bring speed and efficiency to the table, allowing you to complete tasks that would otherwise take ages with hand tools. Think of power tools as the turbo boost for your repair efforts! Two of the most essential power tools to consider are drills and saws.
Drills are incredibly versatile and can be used for a multitude of tasks, from creating holes for screws to mixing paint. When selecting a drill for your emergency toolkit, consider the following:
Corded drills provide consistent power and are great for heavy-duty tasks, while cordless drills offer portability and convenience. If you often find yourself in tight spots or away from power outlets, a cordless drill might be your best bet. However, if you're looking for power and don't mind being tethered, a corded drill could be the way to go.
To maximize the functionality of your drill, don't forget to invest in some essential accessories. Drill bits come in various types, including:
- Twist bits: Ideal for wood and metal.
- Masonry bits: Perfect for drilling into brick or concrete.
- Spade bits: Great for larger holes in wood.
Having the right bits and a reliable charger will ensure your drill is always ready to tackle any task that comes your way.
Saws are another critical component of your emergency toolkit. Whether you need to cut through wood, metal, or plastic, having the right saw can save you time and effort. Consider keeping a mix of hand saws and power saws in your toolkit to handle various cutting tasks efficiently.
No toolkit is complete without safety gear. When working on repairs, your safety should always be a priority. Basic safety gear includes goggles to protect your eyes from debris, gloves to shield your hands from sharp edges, and masks to keep harmful dust at bay. Think of safety gear as your protective armor, ensuring you can tackle repairs without putting yourself at risk.
Selecting appropriate safety gear depends on the type of repairs you are undertaking. For instance, if you're drilling or cutting, goggles and gloves are a must. Always assess the potential hazards of your task and equip yourself accordingly.
To ensure your safety gear remains effective, it's essential to maintain and store it properly. Regularly check your gear for any signs of wear and tear, and clean it after each use. Proper storage in a dry, accessible location will keep your gear ready for action whenever emergencies arise.
In addition to tools and safety gear, having a stash of emergency supplies can be a lifesaver. Items like duct tape, zip ties, and adhesive can provide quick fixes and temporary solutions during unforeseen situations. Picture this: a broken chair leg or a leaky pipe. With the right supplies, you can implement an immediate fix while planning for a more permanent solution later.
Emergency supplies can be utilized in various scenarios. For instance:
- Duct tape: Great for securing loose parts or temporarily patching leaks.
- Zip ties: Perfect for bundling wires or holding items together.
- Adhesive: Useful for quick repairs on broken items.
To ensure your emergency supplies are easily accessible when you need them most, consider organizing them in a dedicated toolbox or storage container. Labeling sections can save you time and frustration during an emergency. Think of it as your own personal treasure chest, filled with tools and supplies ready to spring into action!
Q: What are the most essential tools for an emergency repair kit?
A: At a minimum, you should have screwdrivers, wrenches, pliers, a drill, a saw, and safety gear like goggles and gloves.
Q: How do I choose between a corded and cordless drill?
A: If you need consistent power and will be working in a stationary spot, a corded drill is ideal. For portability and convenience, go for a cordless drill.
Q: How can I effectively store my emergency supplies?
A: Use a dedicated toolbox or storage container, and consider labeling sections for easy access during emergencies.

Basic Hand Tools
This article outlines the must-have tools and supplies for effective emergency repairs, ensuring you're prepared for unexpected situations at home or on the road.
When it comes to emergency repairs, having the right can make all the difference. Think of these tools as your trusty sidekicks, always ready to jump into action when things go awry. From fixing a leaky faucet to tightening a loose chair leg, these tools form the foundation of your repair toolkit. Let’s delve into the essential hand tools you should have on hand.
First up, we have screwdrivers, which come in various sizes and types. A good set typically includes both flathead and Phillips screwdrivers. These are your go-to tools for assembling furniture, replacing batteries, or even prying open stubborn lids. You might be surprised at how often a simple screwdriver can save the day!
Next on the list are wrenches. Whether you're dealing with a plumbing issue or a loose bike chain, having a couple of adjustable wrenches can be a lifesaver. They come in handy for gripping and turning nuts and bolts, making them essential for any repair job. Just imagine trying to fix something without the right wrench – it’s like trying to bake a cake without flour!
Pliers are another indispensable tool. They can grip, twist, and cut wires, making them versatile for various tasks. Needle-nose pliers, in particular, are great for reaching tight spaces, while wire cutters can help you tackle electrical repairs. It’s almost like having a Swiss Army knife at your disposal, ready to handle whatever challenge comes your way!
To give you a clearer picture, here’s a quick table summarizing these essential hand tools:
| Tool | Function |
|---|---|
| Screwdrivers | Assemble furniture, replace batteries, pry open lids |
| Wrenches | Grip and turn nuts and bolts |
| Pliers | Grip, twist, and cut wires |
Having these tools readily available can help you tackle a wide range of repairs efficiently and safely. But remember, it’s not just about having the tools; knowing how to use them is equally important. Take some time to familiarize yourself with each tool and practice using them on simple tasks. You’ll find that confidence builds with experience, and soon, you’ll be a repair guru!
Finally, don't forget to keep your tools organized. A cluttered workspace can lead to accidents and wasted time. Consider investing in a toolbox or a pegboard to keep everything in its place. After all, when an emergency strikes, the last thing you want to do is rummage through a messy pile of tools!
Q: What are the most essential hand tools for beginners?
A: For beginners, a basic toolkit should include screwdrivers, wrenches, pliers, a hammer, and a utility knife. These tools cover most basic repair tasks.
Q: How do I maintain my hand tools?
A: Keep your tools clean and dry, store them properly, and periodically check for rust or damage. Regular maintenance ensures they remain effective and safe to use.
Q: Can I use power tools instead of hand tools?
A: While power tools can speed up the repair process, having hand tools on hand is essential for tasks that require precision or when power sources are unavailable.

Power Tools
When it comes to tackling emergency repairs, having the right can make all the difference between a quick fix and a prolonged headache. These tools are not just a luxury; they are a necessity for anyone who wants to ensure their home or vehicle remains safe and functional. Imagine facing a broken door frame or a leaky pipe—wouldn't you want to resolve it swiftly and efficiently? Power tools can significantly speed up the repair process, allowing you to get back to your daily routine without unnecessary delays.
Power tools, unlike their hand tool counterparts, offer versatility and efficiency. They are designed to handle tougher jobs, making them indispensable for emergency situations. Whether you need to drill, cut, or saw, power tools can help you tackle a variety of tasks with ease. Here are some of the most essential power tools you should consider for your emergency toolkit:
- Drills - Perfect for creating holes in various materials, from wood to metal, and essential for assembling or disassembling items.
- Saws - Whether you opt for a circular saw or a reciprocating saw, these tools are crucial for cutting through wood, plastic, or even metal in a pinch.
- Impact Drivers - These are fantastic for driving screws quickly and efficiently, especially in tough materials.
Power tools can be categorized into two main types: corded and cordless, each with its own set of advantages and disadvantages. Corded tools are typically more powerful and can run indefinitely without the need for recharging, making them ideal for heavy-duty tasks. However, they can be cumbersome due to the need for a power outlet and the risk of tripping over cords. On the other hand, cordless tools offer the convenience of mobility, allowing you to work in areas without easy access to power. This flexibility can be a game changer during emergencies when time is of the essence.
Drills are among the most versatile power tools you can own. They come in various types, including hammer drills and rotary drills, each designed for specific tasks. A hammer drill is perfect for tougher materials like concrete, while a standard rotary drill is great for general use. When selecting a drill for your emergency toolkit, consider the following:
- Power: Higher voltage usually means more power, which is essential for tougher tasks.
- Weight: If you’re going to be using it for extended periods, a lighter model might be more comfortable.
- Battery Life: For cordless drills, look for models with long battery life and quick charging capabilities.
Choosing between corded and cordless drills can be a tough decision. Here’s a quick comparison:
| Feature | Corded Drills | Cordless Drills |
|---|---|---|
| Power | Consistent and higher | Varies, but generally less |
| Mobility | Limited to power outlet | Highly mobile |
| Usage Time | Unlimited | Depends on battery life |
Ultimately, the choice depends on your specific needs and the types of repairs you anticipate. If you often find yourself in situations where you need to move around freely, a cordless drill might be the best option. However, if you’re dealing with heavy-duty jobs, a corded drill could be your best bet.
Don't forget about drill accessories! Having the right bits and chargers can enhance the functionality of your drill. Different tasks require different bits, so consider investing in a set that includes:
- Wood drill bits
- Metal drill bits
- Concrete drill bits
With the right accessories, your drill can become a highly effective tool for a variety of emergency situations, ensuring you’re always prepared for whatever comes your way.
Saws are another essential category of power tools that can make emergency repairs a breeze. From hand saws to power saws, each type serves its purpose. A circular saw is perfect for cutting large pieces of wood quickly, while a jigsaw allows for intricate cuts. The key is to have a variety of saws available, so you can handle any cutting task that arises during an emergency.
In conclusion, investing in quality power tools is crucial for anyone looking to be prepared for emergency repairs. They not only save time but can also enhance the quality of your work. So, whether you're a seasoned DIY-er or just starting, make sure your toolkit is equipped with these essential power tools!

Drills
When it comes to emergency repairs, having the right drill in your toolkit can be a game changer. Drills are not just tools; they are the magic wands of the DIY world, turning your frantic attempts at fixing things into smooth, efficient operations. Imagine you’re faced with a loose cabinet door or a wobbly chair leg. Instead of struggling with a manual screwdriver, you can whip out your drill and get the job done in a fraction of the time. But with so many types of drills available, how do you know which one to choose?
First off, let’s explore the types of drills you might consider for your emergency toolkit. The most common types are corded drills and cordless drills. Corded drills are great for heavy-duty tasks since they provide continuous power without the need for recharging. However, they can be a bit restrictive due to their dependence on an outlet. On the other hand, cordless drills offer the freedom to move around without being tethered to a wall, making them ideal for quick fixes on the go. Each type has its advantages, but your choice should depend on your specific needs and the nature of the repairs you anticipate.
When selecting a drill, consider the voltage for cordless models, as higher voltage typically means more power. A 12V drill is suitable for light tasks, while a 20V drill can handle more demanding jobs. Additionally, think about the speed settings; drills with multiple speed settings allow for greater versatility. You can use slower speeds for delicate tasks and higher speeds for tougher materials. It's like having a Swiss Army knife in your toolbox!
To further enhance your drilling experience, investing in quality drill accessories is crucial. Here are some essentials you should consider:
- Drill Bits: Different materials require different bits. For example, wood bits are specifically designed for drilling into wood, while masonry bits are perfect for brick or concrete.
- Charger: If you opt for a cordless drill, ensure you have a reliable charger. A dead battery can turn a quick fix into a frustrating wait.
- Carrying Case: Keeping your drill and accessories organized not only prolongs their lifespan but also saves you time during emergencies.
In conclusion, a drill is an essential tool in any emergency repair kit. It not only saves you time but also empowers you to tackle a wide range of tasks with confidence. Whether you’re a seasoned DIY enthusiast or just starting, understanding the types of drills available and how to choose the right one will set you up for success. So, before you find yourself in a sticky situation, make sure your toolkit is equipped with a reliable drill that meets your needs!
Q: What type of drill is best for beginners?
A: A cordless drill is often recommended for beginners due to its ease of use and versatility. Look for one with a comfortable grip and multiple speed settings.
Q: How do I maintain my drill?
A: Regularly clean your drill after use, check for any wear on the bits, and ensure the battery is charged. Store it in a dry place to avoid rusting.
Q: Can I use my drill for tasks other than drilling?
A: Absolutely! Many drills come with attachments that allow you to use them for tasks like sanding, mixing paint, or even driving screws, making them a versatile addition to your toolkit.

Corded vs. Cordless
When it comes to choosing between corded and cordless drills, the decision can feel a bit overwhelming, especially if you're not sure what you really need for your emergency toolkit. Both options have their unique advantages and disadvantages, and understanding these can help you make an informed choice that aligns with your repair needs.
Let's start with corded drills. These tools are powered directly from an electrical outlet, which means you don't have to worry about battery life. This can be a huge advantage when you're in the middle of a project and suddenly realize your battery is dead. Corded drills typically offer more power and torque, making them ideal for heavy-duty tasks like drilling into concrete or metal. However, the downside is their limited mobility. You’re tethered to a power source, which can restrict your range of motion and make it challenging to work in tight spaces or outdoors.
On the flip side, cordless drills have become increasingly popular due to their convenience and versatility. These drills run on rechargeable batteries, allowing you to take them anywhere without being restricted by cords. This mobility is a game-changer, especially during emergency repairs when you might need to navigate around furniture or other obstacles. Modern cordless drills are also quite powerful and can handle most household tasks with ease. However, you must keep an eye on the battery life, as running out of power mid-job can be frustrating.
To help you visualize the differences, here's a simple comparison:
| Feature | Corded Drills | Cordless Drills |
|---|---|---|
| Power | Higher, consistent power | Varies with battery charge |
| Mobility | Limited by cord length | Highly portable |
| Weight | Generally heavier | Lighter, depending on battery |
| Battery | No battery needed | Requires charging |
Ultimately, the choice between corded and cordless drills boils down to your specific needs. If you often find yourself in situations where power is accessible and you need a tool that can handle heavy-duty tasks, a corded drill might be your best bet. However, if you value mobility and the ability to work in various locations without the hassle of cords, a cordless drill is likely the way to go. Consider your usual projects and the environments in which you'll be working to make the best decision for your emergency toolkit.
- What is the main advantage of a corded drill?
Corded drills provide consistent power and are ideal for heavy-duty tasks. - Can I use a cordless drill for heavy-duty projects?
Yes, many modern cordless drills are powerful enough for most household tasks, but they may not match the torque of corded drills. - How long do cordless drill batteries typically last?
Battery life can vary, but most modern batteries last for several hours of continuous use. - Are corded drills heavier than cordless drills?
Generally, yes, corded drills tend to be heavier due to the motor and power cord.

Drill Accessories
When it comes to enhancing the functionality of your drill, the right accessories can make all the difference. Think of your drill as a Swiss Army knife; it can do a lot, but it needs the right tools to unlock its full potential. From various drill bits to chargers, each accessory plays a crucial role in ensuring that your emergency toolkit is versatile and ready for action.
First and foremost, let's talk about drill bits. These are the heart and soul of your drilling tasks. Depending on the material you're working with, you'll need different types of bits. For example:
- Twist Bits: Ideal for drilling into wood and metal.
- Masonry Bits: Perfect for concrete and brick.
- Spade Bits: Great for larger holes in wood.
Having a variety of bits on hand means that you won’t be caught off guard when an unexpected repair pops up. It’s like having a well-stocked pantry; you never know when you’ll need that special ingredient!
Next up are chargers. If you’re using a cordless drill, a reliable charger is essential. Imagine being halfway through a project, only to have your drill die on you. That’s a nightmare scenario! Most modern drills come with quick chargers that can juice up your battery in no time. Make sure you have a backup charger or a second battery, just in case. After all, it’s better to be safe than sorry!
Another accessory worth mentioning is the depth stop. This nifty little tool allows you to control how deep you drill into a material, preventing any accidental breaches that could lead to costly repairs. It’s like having a safety net when you’re walking a tightrope—keeping you steady and secure.
Lastly, let’s not forget about case organizers. Keeping your drill accessories organized is key to quick access during emergencies. A cluttered toolbox can lead to frustration and wasted time. Invest in a sturdy case or organizer that keeps everything neatly stored and easy to find. Imagine searching for your favorite tool in a messy garage; it’s a hassle you don’t want to deal with when time is of the essence!
In summary, the right drill accessories can significantly enhance your repair capabilities. By ensuring you have a diverse selection of drill bits, reliable chargers, handy depth stops, and proper storage solutions, you’ll be well-equipped to tackle any emergency repair that comes your way. So gear up, and let your drill do the heavy lifting!
Q1: What types of drill bits should I have for home repairs?
A1: It’s advisable to have a set of twist bits for general use, masonry bits for concrete, and spade bits for larger holes in wood. This variety will cover most common tasks.
Q2: How do I know if I need a corded or cordless drill?
A2: If you need portability and flexibility, go for a cordless drill. However, if you’ll be working on heavy-duty tasks for extended periods, a corded drill might be more suitable.
Q3: How can I maintain my drill accessories?
A3: Keep your bits clean and dry, store them in a protective case, and regularly check for wear and tear. Proper maintenance will extend their lifespan and performance.

Saws
Saws are indispensable tools in any emergency repair toolkit, enabling you to cut through various materials with precision and ease. Whether you're tackling a home improvement project or dealing with unexpected repairs on the road, having the right saw can make all the difference. There are several types of saws available, each designed for specific tasks, and understanding their applications can help you choose the best one for your needs.
First up, we have hand saws. These classic tools are perfect for simple tasks, like cutting wood or trimming branches. They require no power source, making them reliable for outdoor use or in situations where electricity is unavailable. Hand saws come in various shapes and sizes, including the traditional panel saw, which is great for making straight cuts, and the coping saw, which is ideal for intricate cuts in wood or plastic.
On the other hand, if you're looking for speed and efficiency, power saws are your best bet. These tools can significantly reduce the time it takes to complete a task, especially when dealing with tougher materials. Among the most popular power saws are the circular saw and the reciprocating saw. The circular saw is fantastic for making straight cuts in large sheets of plywood or lumber, while the reciprocating saw excels at demolition tasks, allowing you to cut through pipes, nails, and other materials with ease.
When selecting a saw for your emergency toolkit, consider the following factors:
- Type of Material: Different saws work better on different materials. For instance, a jigsaw is excellent for cutting curves in wood, while a hacksaw is perfect for metal.
- Portability: If you plan to use your saw in various locations, consider a lightweight, cordless option.
- Ease of Use: Ensure that the saw you choose is comfortable to handle and easy to operate, especially in emergency situations where time is of the essence.
In addition to choosing the right saw, it's essential to maintain your tools properly. Regular cleaning and lubrication will ensure that your saws remain in excellent working condition, ready to tackle any challenge that comes your way. Always store your saws in a safe place, away from moisture and extreme temperatures, to prolong their lifespan.
In summary, having a variety of saws in your emergency toolkit can save you time and effort when unexpected repairs arise. Whether you opt for hand saws for their simplicity or power saws for their speed, understanding the strengths and weaknesses of each type will help you be better prepared for any situation. Remember, the right tool can turn a daunting task into a manageable one!
Q: What type of saw is best for cutting wood?
A: A circular saw is typically the best choice for cutting wood quickly and accurately. For finer cuts, a jigsaw or hand saw may be more suitable.
Q: Can I use a reciprocating saw for metal?
A: Yes, a reciprocating saw can cut through metal, but make sure to use the appropriate blade designed for metal cutting.
Q: How do I maintain my saws?
A: Regularly clean your saws after use, lubricate moving parts, and store them in a dry place to prevent rust and damage.

Safety Gear
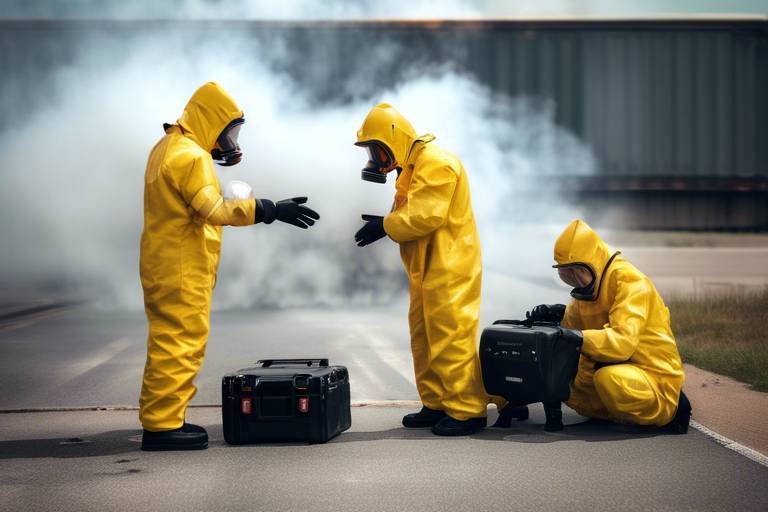
When it comes to tackling emergency repairs, is not just an accessory; it’s an absolute necessity. Imagine you’re in the middle of fixing a leaky pipe or repairing a broken fence, and suddenly, a sharp object slips or a bit of debris flies your way. Without the right protective equipment, what could have been a simple fix can turn into a trip to the emergency room. So, let’s dive into the essential safety gear that every DIY enthusiast and homeowner should have on hand.
First and foremost, you need to protect your eyes. A good pair of safety goggles can be a lifesaver, shielding your eyes from dust, debris, and harmful chemicals. Think of them as your personal shield against the unexpected. Next up is hand protection. A sturdy pair of work gloves can prevent cuts and scrapes while providing a better grip on tools and materials. It’s like having a second skin that’s tough enough to handle the job but flexible enough to allow you to work efficiently.
But it doesn’t stop there! Depending on the tasks you’re tackling, you might also want to consider wearing a dust mask or respirator. This is especially important if you’re working with materials that produce harmful dust or fumes. Just picture yourself sanding wood or mixing chemicals; without a mask, you could be inhaling particles that could cause long-term health issues. Safety gear is truly about protecting yourself so you can focus on the task at hand without worrying about what might go wrong.
Choosing the right gear can sometimes feel overwhelming, but it doesn’t have to be. Here are a few tips to help you make the right decisions:
- Assess the Task: Consider what kind of repairs you’ll be doing. Will you be cutting wood, working with electrical components, or handling chemicals? Each task may require different gear.
- Fit Matters: Always choose gear that fits well. Ill-fitting goggles or gloves can be just as dangerous as not wearing any at all.
- Quality Over Price: While it might be tempting to go for the cheapest option, investing in quality safety gear can save you from serious injuries in the long run.
Once you’ve selected your safety gear, it’s essential to keep it in good condition. Regular maintenance ensures that your protective equipment is always ready to go when you need it. For example, check your goggles for scratches and your gloves for any signs of wear and tear. Store them in a dry, cool place to prevent deterioration. Just like your tools, your safety gear deserves some TLC!
In conclusion, having the right safety gear is crucial for anyone involved in emergency repairs. It’s not just about looking the part; it’s about ensuring your well-being while you tackle unexpected challenges. So, gear up, stay safe, and don’t let a little hazard stand in the way of your DIY success!
Q: What is the most important piece of safety gear?
A: While all safety gear is important, safety goggles are often considered essential as they protect your eyes from debris and chemicals.
Q: How do I know which gloves to choose?
A: Choose gloves based on the materials you’ll be handling. For example, heavy-duty work gloves are great for handling sharp objects, while rubber gloves are ideal for working with chemicals.
Q: Can I use regular masks instead of dust masks?
A: Regular masks are not designed to filter out harmful dust and particles. It’s best to use a dust mask or respirator specifically rated for the job.

Choosing the Right Gear
When it comes to tackling emergency repairs, choosing the right safety gear is just as crucial as selecting the right tools. Your safety should never take a backseat, and having the appropriate gear can make all the difference between a successful repair and a trip to the emergency room. So, how do you ensure you're well-equipped? Let’s dive into the essential factors to consider when selecting your safety gear.
First off, think about the type of repairs you’ll be doing. Are you working with power tools, handling sharp objects, or dealing with hazardous materials? Each scenario demands specific gear. For instance, if you’re using a saw, a sturdy pair of gloves is non-negotiable to protect your hands from cuts. Likewise, if you’re drilling into walls, a good pair of goggles will shield your eyes from flying debris. The right gear acts like a safety net, catching you before you fall into a world of pain and injury.
Next, consider the fit and comfort of your gear. It’s not just about protection; it’s about being able to move freely while you work. A tight-fitting mask might keep dust out, but if it restricts your breathing, you’ll be more focused on discomfort than on making those repairs. Aim for gear that offers a balance between safety and comfort. For example, look for gloves that provide both grip and flexibility, allowing you to handle tools with precision while keeping your hands safe.
Another essential aspect is the material of your safety gear. Different materials offer varying levels of protection. For example, nitrile gloves are excellent for handling chemicals, while leather gloves are better suited for heavy-duty tasks. Similarly, ensure your goggles are made from shatter-resistant material to withstand any unexpected impacts. When you invest in quality materials, you’re essentially investing in your safety.
Finally, don’t forget to check for certifications. Safety gear often comes with certifications that indicate it meets certain safety standards. Look for labels that say “ANSI” for American National Standards Institute or “OSHA” for Occupational Safety and Health Administration compliance. These certifications can give you peace of mind, knowing that your gear has been tested and proven to keep you safe.
In summary, when selecting your safety gear for emergency repairs, keep the following factors in mind:
- Type of Repairs: What tasks will you be undertaking?
- Fit and Comfort: Can you move freely while protected?
- Material: Is it suitable for the hazards you'll face?
- Certifications: Does it meet safety standards?
By considering these factors, you’ll be better prepared to choose the right safety gear that not only protects you but also allows you to work efficiently. Remember, the goal is to keep yourself safe while ensuring that those emergency repairs go off without a hitch!
Q: How often should I replace my safety gear?
A: It’s advisable to inspect your safety gear regularly for signs of wear and tear. Replace items like gloves and masks when they become damaged or lose their effectiveness.
Q: Can I use regular gloves instead of safety gloves?
A: Regular gloves may not provide the necessary protection for specific tasks. Always choose gloves that are designed for the type of work you’ll be doing.
Q: Is it necessary to wear safety goggles if I'm just doing minor repairs?
A: Yes! Eye protection is crucial even for minor tasks, as accidents can happen in the blink of an eye.

Maintenance of Safety Gear
Maintaining your safety gear is crucial to ensure it performs effectively when you need it the most. Just like a car requires regular oil changes and tire rotations, your safety equipment needs care to keep you protected during emergency repairs. Think of your safety gear as your personal shield; if it’s not in top condition, it won’t offer the protection you expect. So, what are some best practices for keeping your gear in great shape? Let's dive in!
First and foremost, always inspect your safety gear before and after use. This means checking for any signs of wear and tear, such as frayed straps on gloves or scratches on goggles. If you notice any damage, it's best to replace the item immediately. After all, a small crack in your safety goggles might not seem like a big deal, but it could impair your vision when you're working on a critical repair. Regular inspections can prevent accidents and ensure your gear remains reliable.
Next, proper cleaning is essential. Depending on the type of safety gear, you may need to wash or wipe down items after each use. For example, gloves can accumulate dirt and grime, which can degrade their material over time. A simple wash with mild soap and water can extend their lifespan significantly. On the other hand, goggles can be cleaned with a soft cloth and a gentle cleaner to remove smudges and ensure clear visibility. Remember, cleanliness not only maintains the gear but also enhances your safety!
Storing your safety gear correctly is another vital aspect of maintenance. You wouldn’t leave your tools lying around in the rain, right? The same goes for your safety equipment. Store your gear in a cool, dry place, away from direct sunlight, which can cause materials to degrade. Consider using a dedicated storage box or a specific section in your toolbox to keep everything organized. This way, you can quickly grab what you need when an emergency arises, without fumbling through a cluttered mess.
Additionally, consider keeping a maintenance log for your safety gear. This can be as simple as a notebook or a digital document where you track inspection dates, cleaning schedules, and any repairs or replacements made. This log not only helps you stay organized but also gives you a clear picture of when it's time to invest in new gear. Just like you wouldn't ignore a blinking check engine light, don’t overlook the maintenance needs of your safety equipment!
In summary, maintaining your safety gear is all about regular inspections, proper cleaning, appropriate storage, and keeping a maintenance log. By following these steps, you can ensure that your safety gear remains effective and ready for action whenever an emergency strikes. Remember, being prepared is half the battle, and your safety gear is your first line of defense!
- How often should I inspect my safety gear? It's best to inspect your safety gear before each use and after any significant repair tasks.
- Can I wash my safety gloves in the washing machine? It depends on the material. Always check the manufacturer's guidelines. Hand washing is typically safer for delicate materials.
- What’s the best way to store my safety goggles? Store them in a protective case to prevent scratches and keep them away from direct sunlight.
- How can I tell if my safety gear needs replacing? Look for visible signs of wear, such as cracks, tears, or fading colors. If you have any doubts about its integrity, it's better to replace it.

Emergency Supplies
When it comes to emergency repairs, having the right supplies on hand can make all the difference between a minor inconvenience and a major disaster. Imagine you're in the middle of a home project, and suddenly, something goes wrong. Perhaps a pipe bursts, or a piece of furniture breaks. This is where your emergency supplies come into play, acting as your first line of defense against unexpected mishaps. By ensuring you have a well-stocked toolkit of essential items, you can tackle these challenges head-on without breaking a sweat.
Among the most versatile and crucial items in your emergency repair arsenal are duct tape, zip ties, and adhesives. These supplies can provide quick fixes that are often just as effective as more permanent solutions. For instance, duct tape is not just for sealing boxes; it can hold things together, patch up leaks, and even serve as a temporary fix for a broken window until you can replace the glass. Similarly, zip ties can be a lifesaver for organizing cables or securing items that need to stay in place. And let’s not forget about adhesives, which can bond materials together, giving you the flexibility to repair a variety of items.
Here’s a quick overview of some essential emergency supplies and their common uses:
| Supply | Common Uses |
|---|---|
| Duct Tape | Sealing, patching, temporary repairs |
| Zip Ties | Cable management, securing items, temporary fixes |
| Adhesive | Bonding materials, repairing items |
But having these supplies is only half the battle. You also need to think about organization and storage. Keeping your emergency supplies organized not only saves time when you need them but also ensures that you can quickly locate what you need in a pinch. Consider investing in a sturdy toolbox or a dedicated storage container that can house all your essentials. Labeling compartments can also help you find items faster, especially during high-pressure situations.
Furthermore, it's wise to periodically check your emergency supplies to ensure that everything is in good condition and ready for use. Items like adhesives can dry out, and duct tape can lose its stickiness over time. By maintaining your supplies, you can avoid the frustration of reaching for something only to find it's no longer usable.
In conclusion, stocking your home or vehicle with the right emergency supplies is not just about convenience; it's about being prepared. When you have a reliable set of tools and materials at your disposal, you're not just fixing problems—you're empowering yourself to take control of unexpected situations. So, take a moment to assess your current supplies and make sure you're ready for whatever life throws your way.
Q: What are the most essential emergency supplies I should have?
A: While it can vary based on your specific needs, some of the most essential supplies include duct tape, zip ties, various adhesives, and a basic toolbox with hand tools.
Q: How should I store my emergency supplies?
A: It's best to store your emergency supplies in a dedicated toolbox or storage container that is clearly labeled. This helps you find what you need quickly in an emergency.
Q: How often should I check my emergency supplies?
A: You should check your emergency supplies at least once every few months to ensure that everything is in good working condition and that nothing has expired or dried out.

Common Uses
When it comes to emergency repairs, having the right supplies can be a game changer. Among the most versatile tools in your arsenal are duct tape, zip ties, and various types of adhesives. These items can serve multiple purposes, making them invaluable during unexpected situations. For instance, duct tape is not just for sealing boxes; it can temporarily fix leaky pipes, hold together broken furniture, or even serve as a makeshift bandage in a pinch. Imagine you’re on a camping trip, and your tent rips—duct tape can save the day!
Zip ties, on the other hand, are fantastic for organizing loose cables or securing items that need to be held together. They can be used to repair a broken chair leg or to bundle tools when you’re in a hurry. Their strength and ease of use make them a go-to for quick fixes. And let’s not forget about adhesives. Whether it’s super glue for a quick bond or epoxy for a stronger hold, the right adhesive can make a world of difference when you need to mend something fast.
Here’s a brief overview of the common uses for these emergency supplies:
| Supply | Common Uses |
|---|---|
| Duct Tape |
|
| Zip Ties |
|
| Adhesives |
|
In addition to these common uses, it’s essential to remember that creativity plays a significant role in emergency repairs. Sometimes, the best solutions come from thinking outside the box. For example, if you need to fix a loose door handle, a combination of zip ties and duct tape can do the trick until you can replace it properly. The key is to remain calm and resourceful, using the supplies at your disposal to tackle the problem head-on.
Ultimately, the effectiveness of these supplies lies in your ability to adapt them to your specific situation. Whether you’re at home, on the road, or out in the wilderness, having a well-stocked emergency kit can make all the difference. So, take a moment to assess your toolkit and ensure you’re equipped to handle whatever life throws your way!
Q: What should I include in my emergency repair toolkit?
A: Essential items include basic hand tools like screwdrivers and pliers, power tools like drills and saws, safety gear, and versatile emergency supplies such as duct tape, zip ties, and adhesives.
Q: How can I organize my emergency supplies for easy access?
A: Use clear plastic bins or toolboxes to categorize supplies. Label each container for quick identification, and keep your toolkit in a designated area that is easy to reach during emergencies.
Q: Are there any safety precautions I should take while using power tools?
A: Always wear appropriate safety gear, such as goggles and gloves, and read the user manual for each tool. Ensure your workspace is clear and well-lit to minimize risks.

Storage Solutions
When it comes to emergency repairs, having the right tools and supplies is only half the battle; the other half lies in how you store and organize them. Imagine needing a tool in a hurry, only to find that it’s buried under a mountain of clutter. Frustrating, right? To avoid such predicaments, implementing effective storage solutions can make all the difference. A well-organized toolkit not only saves time but also ensures that you can quickly access what you need when unexpected situations arise.
First and foremost, consider investing in a sturdy toolbox or a dedicated storage container. These come in various sizes and configurations, allowing you to choose one that best suits your collection of tools and emergency supplies. Look for options with compartments and removable trays, which can help you categorize your items effectively. For example, you might want to keep your hand tools in one section, while your power tools and their accessories are neatly stored in another. This way, you won't waste precious moments searching for that elusive screwdriver when time is of the essence.
Another effective strategy is to utilize clear plastic bins or organizers. These allow you to see at a glance what you have, which can be a lifesaver in an emergency. Labeling each bin or drawer can further streamline your process. For instance, you could have a bin labeled "Emergency Supplies" containing duct tape, zip ties, and adhesive, and another labeled "Safety Gear" for goggles, gloves, and masks. This visual organization not only makes your toolkit user-friendly but also helps you keep track of your inventory.
Don't forget about vertical storage options, especially if you're short on space. Wall-mounted pegboards can be a game-changer, providing a designated spot for each tool. This method keeps your tools visible and accessible, while also freeing up valuable floor space. You can hang everything from screwdrivers and pliers to safety gear, ensuring that everything has its place. Plus, it adds a touch of organization to your workspace, making it more inviting to tackle those emergency repairs.
Finally, consider creating a checklist of your essential tools and supplies. This will not only help you remember what you have but also assist you in identifying what might be missing. Regularly reviewing and updating this list can ensure you're always prepared for any situation. Remember, the goal is to create a system that works for you, so take the time to experiment with different storage methods until you find the perfect fit.
Q: What are the best materials for a toolbox?
A: Look for durable materials like metal or high-quality plastic that can withstand wear and tear. A toolbox with a water-resistant feature is also a plus to protect your tools from moisture.
Q: How often should I reorganize my emergency supplies?
A: It’s a good practice to reorganize your supplies every few months or after any major use. This helps you keep track of what you have and what needs replenishing.
Q: Can I use my garage for tool storage?
A: Absolutely! Garages are often ideal for tool storage, but make sure to keep them organized and protected from extreme temperatures or humidity, which can damage your tools over time.
Q: What should I do if I run out of storage space?
A: If space is tight, consider downsizing your collection by removing tools or supplies that you rarely use. Alternatively, think about vertical storage options or compact organizers that can maximize your available space.
Frequently Asked Questions
- What basic hand tools should I have for emergency repairs?
For emergency repairs, it's essential to have a set of basic hand tools that includes screwdrivers, wrenches, and pliers. These tools form the foundation for tackling various tasks efficiently. A good quality hammer and a utility knife are also important additions to your toolkit.
- Are power tools necessary for emergency repairs?
While not strictly necessary, power tools like drills and saws can significantly speed up the repair process. They provide versatility and can handle tougher jobs that manual tools might struggle with, making them invaluable during emergencies.
- What are the advantages of corded vs. cordless drills?
Corded drills typically offer more power and are ideal for heavy-duty tasks, while cordless drills provide portability and ease of use. Your choice depends on the types of repairs you anticipate; if you need to move around a lot, a cordless drill might be the better option.
- How do I choose the right safety gear for repairs?
Selecting the right safety gear depends on the specific tasks you are undertaking. For most repairs, goggles, gloves, and a mask are essential. Always consider the potential hazards involved in your project and choose gear that offers adequate protection.
- What emergency supplies should I keep on hand?
Essential emergency supplies include duct tape, zip ties, and adhesive. These items can provide quick fixes and temporary solutions in unforeseen situations. Having a well-stocked supply of these materials can save you time and stress during an emergency.
- How can I effectively store my emergency supplies?
Organizing your emergency supplies in a dedicated toolbox or storage bin can make them easily accessible when needed. Consider using clear containers for visibility and labeling them for quick identification. This way, you won't waste time searching for what you need in an emergency!