Preparing for Medical Emergencies - An Essential Guide
When it comes to medical emergencies, being prepared can mean the difference between life and death. Imagine you're at a family gathering and someone suddenly collapses – what would you do? In moments like these, having the right knowledge and tools at your disposal can empower you to act swiftly and effectively. This guide provides crucial information for effectively preparing for medical emergencies, covering essential skills, supplies, and strategies to ensure safety and quick response in critical situations. By understanding the types of emergencies, learning key first aid skills, and assembling a well-stocked first aid kit, you can become a vital resource in times of need.
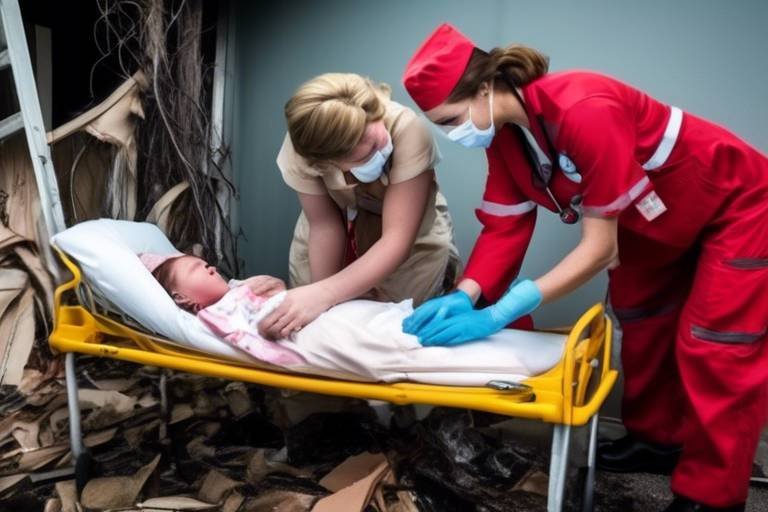
Different medical emergencies require specific responses, and knowing how to identify them can save lives. Common emergencies include cardiac arrest, allergic reactions, and trauma. Each of these situations demands a unique approach:
- Cardiac Arrest: The heart stops beating effectively, and immediate action is crucial.
- Allergic Reactions: Severe reactions can lead to anaphylaxis, which requires quick intervention.
- Trauma: Injuries from accidents or falls need appropriate care to prevent complications.
Recognizing these types of emergencies and understanding the appropriate responses can significantly improve outcomes. So, the next time you find yourself in a critical situation, you'll know exactly how to react.
Learning essential first aid skills can save lives and instill confidence in your ability to handle emergencies. Whether it's performing CPR, caring for wounds, or administering choking relief, these skills are invaluable. With the right training, you can transform panic into action, ensuring that you are ready to help when every second counts. Let's dive into some of the key techniques that can empower you to act decisively during emergencies.
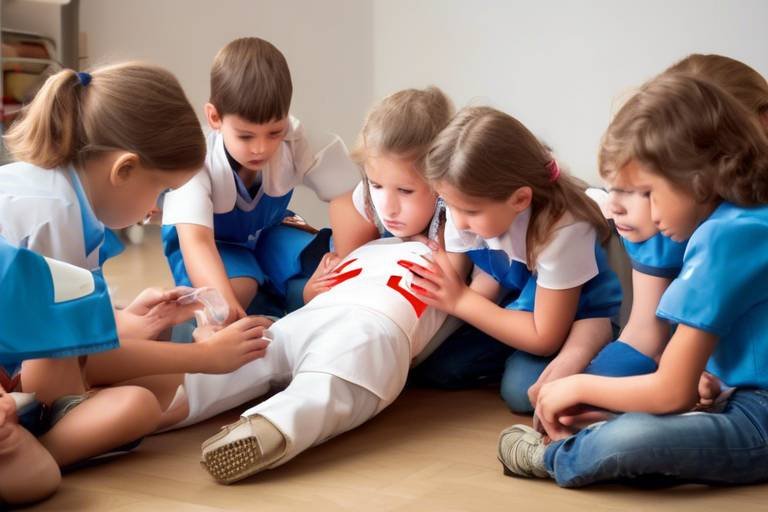
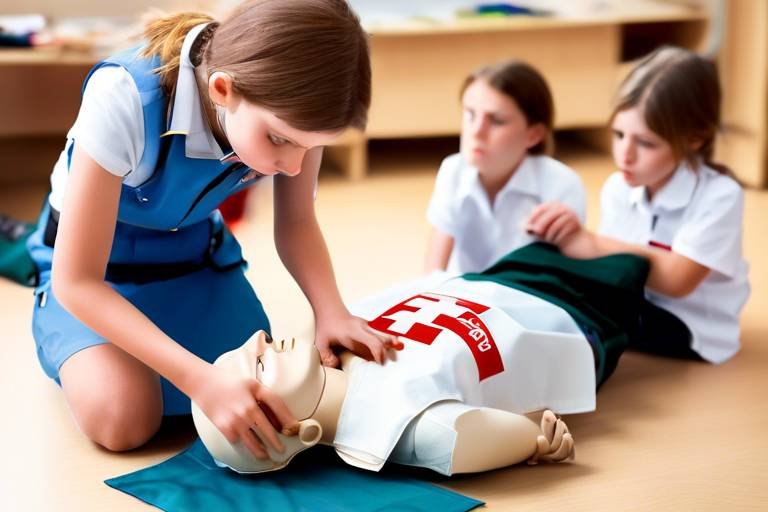
CPR is a lifesaving technique used in emergencies when someone's breathing or heartbeat has stopped. Knowing how to perform CPR can be the difference between life and death. The steps to perform CPR effectively include:
- Call for emergency help.
- Check for responsiveness.
- Begin chest compressions at a rate of 100-120 compressions per minute.
- Provide rescue breaths if trained to do so.
CPR should be applied immediately when you suspect cardiac arrest. The quicker you act, the better the chances of survival.
Understanding the signs of cardiac arrest is vital. Look for symptoms such as:
- Unresponsiveness
- No normal breathing
- Pale or bluish skin
Being able to identify these signs quickly can help you initiate timely intervention and improve survival chances.
The technique for performing CPR varies between adults and children. For adults, you use two hands for compressions, while for children, one hand may suffice. It's essential to adapt your approach based on the age group you're dealing with, ensuring that the pressure you apply is appropriate for their size.
Proper wound care is essential in preventing infection and promoting healing. After an injury, the first step is to clean the wound gently with soap and water. Then, apply a sterile dressing to protect it from bacteria. Monitoring the wound for signs of infection, such as redness or pus, is also crucial. Remember, taking these steps can significantly impact recovery and reduce complications.
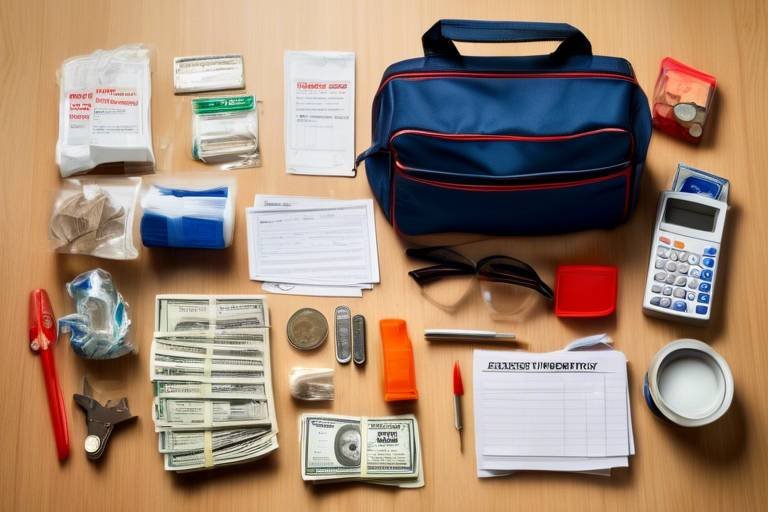
A well-stocked first aid kit is crucial for managing emergencies. Your kit should include items such as:
- Adhesive bandages
- Antiseptic wipes
- Gauze and tape
- Scissors and tweezers
- CPR face shield
Having these essentials on hand ensures you are prepared for various medical situations that may arise, whether at home or on the go.
Every individual or family may have unique needs. Consider customizing your first aid kit based on specific health concerns, activities, or environments. For instance, if you have a family member with allergies, include an epinephrine auto-injector. If you frequently hike, add items for treating blisters or sprains. Tailoring your kit makes it more effective in addressing your specific circumstances.
Regularly checking and maintaining your first aid kit ensures its effectiveness. Aim to review your kit at least once every six months. Replace expired or used items, and make sure everything is in working order. A well-maintained kit is your best ally in an emergency.
Q: How often should I refresh my first aid skills?
A: It's recommended to take a refresher course every two years to stay updated on the latest techniques.
Q: Can I use my first aid kit for minor injuries?
A: Absolutely! Your first aid kit is perfect for treating minor cuts, scrapes, and bruises.
Q: What should I do if I’m unsure about a medical emergency?
A: If you're ever in doubt, it's best to call emergency services for guidance. They can provide instructions until help arrives.

Understanding Types of Medical Emergencies
When it comes to medical emergencies, being prepared can make all the difference between life and death. Various situations can arise, each demanding a specific response. Understanding the types of medical emergencies is the first step in ensuring that you can react appropriately when the unexpected occurs. Whether it’s a sudden cardiac arrest, a severe allergic reaction, or a traumatic injury, recognizing these emergencies and knowing how to respond can empower you to take decisive action.
Let’s dive into some of the most common medical emergencies you might encounter:
- Cardiac Arrest: This is a critical condition where the heart unexpectedly stops beating. Without immediate intervention, it can lead to death within minutes.
- Allergic Reactions: Allergies can escalate quickly, especially if they lead to anaphylaxis, a severe and potentially life-threatening reaction.
- Trauma: Injuries from falls, accidents, or violence can result in significant bleeding, fractures, or other serious conditions that require immediate care.
- Stroke: Recognizing the signs of a stroke is crucial for timely treatment. Symptoms may include sudden numbness, confusion, difficulty speaking, or severe headache.
- Choking: This occurs when an object gets lodged in the throat, blocking airflow. Quick action can prevent loss of consciousness and potential brain damage.
Each of these emergencies requires a different approach and set of skills. For instance, knowing how to perform CPR is vital in the case of cardiac arrest, while having an epinephrine auto-injector on hand is crucial for someone with severe allergies. Understanding these emergencies can also help alleviate panic during high-stress situations, allowing you to act with clarity and purpose.
Moreover, it’s essential to stay calm and focused when faced with a medical emergency. Your reaction can set the tone for the situation and influence the outcome significantly. Just like a fire drill prepares you for a real fire, understanding these medical emergencies prepares you for the unexpected. So, equip yourself with knowledge, practice your skills, and be ready to help when it matters most!

Essential First Aid Skills
When it comes to emergencies, having the right skills can make all the difference. Imagine being in a situation where someone's life hangs in the balance, and you have the power to act. are not just nice-to-have; they are critical tools that can empower you to save lives and provide comfort during distressing times. Whether it's a friend who has fainted at a party or a stranger who collapses on the street, knowing how to respond effectively can turn a potential tragedy into a story of survival.
Among the most crucial skills you can learn are Cardiopulmonary Resuscitation (CPR), wound care, and choking relief. Each of these techniques serves a specific purpose and can be the difference between life and death. Let's dive deeper into these skills, starting with CPR, which is often the first thing that comes to mind when people think of first aid.
CPR is a lifesaving technique used when someone's breathing or heartbeat has stopped. It's a straightforward process that can be learned by anyone, and it’s vital to act quickly. When you perform CPR, you're essentially acting as a temporary heart and lungs for the victim until professional help arrives. The steps to perform CPR effectively include:
- Check the scene for safety.
- Tap the person and shout, "Are you okay?"
- If unresponsive, call emergency services immediately.
- Begin chest compressions at a rate of 100-120 compressions per minute.
- After 30 compressions, give 2 rescue breaths if trained to do so.
It's important to remember that CPR can be performed on both adults and children, but the techniques differ slightly. For adults, use both hands for compressions, while for children, one hand may suffice. Infants require a gentler touch, using two fingers for compressions. Knowing these variations can enhance your effectiveness in a crisis.
Understanding the signs of cardiac arrest is vital for timely intervention. Look for symptoms such as:
- Sudden collapse
- Unresponsiveness
- No pulse or breathing
By recognizing these signs early, you can initiate help sooner, significantly improving the victim's chances of survival.
When it comes to performing CPR, the technique varies based on the age of the individual. For adults, the focus is on hard and fast chest compressions, while for children and infants, the approach is more gentle. Here’s a quick comparison:
| Age Group | Compression Technique | Rescue Breaths |
|---|---|---|
| Adults | Use both hands | 2 breaths after 30 compressions |
| Children | One hand may be used | 2 breaths after 30 compressions |
| Infants | Use 2 fingers | 2 breaths after 30 compressions |
Now, let's shift gears to another essential skill: wound care. Knowing how to treat wounds properly is key in preventing infections and promoting healing.
Proper wound care involves several steps. First, you must clean the wound to remove any dirt or debris. This can be done using clean water or saline solution. After cleaning, apply an appropriate dressing to keep the wound protected. Monitoring the wound for signs of infection—like increased redness, swelling, or pus—is equally important. Always remember, a well-cared-for wound heals faster, reducing the risk of complications.
In summary, mastering these essential first aid skills can make you a crucial asset in any emergency situation. The confidence that comes from knowing how to respond effectively can not only save lives but can also provide peace of mind for you and those around you. So, why not take the plunge? Consider enrolling in a first aid and CPR course today!
Q: How often should I refresh my first aid skills?
A: It's recommended to refresh your first aid skills every two years, as techniques and guidelines can change.
Q: Is it necessary to have a first aid kit at home?
A: Absolutely! A well-stocked first aid kit can be a lifesaver in emergencies, providing immediate care before professional help arrives.
Q: Can I perform CPR on someone who is breathing?
A: No, CPR is only for individuals who are unresponsive and not breathing. If someone is breathing but unconscious, place them in the recovery position and call for help.

Cardiopulmonary Resuscitation (CPR)
is a lifesaving skill that everyone should know. Imagine walking into a room and finding someone collapsed, unresponsive, and not breathing. Panic sets in, and your heart races. But what if you could be the one to turn that situation around? CPR can double or even triple a person's chance of survival after a cardiac arrest. It's not just a technique; it's a beacon of hope in dire circumstances.
Understanding when and how to perform CPR is essential. The technique involves a combination of chest compressions and rescue breaths, aimed at keeping oxygen flowing to the brain and vital organs until professional help arrives. So, how do you perform CPR effectively? Here’s a simple breakdown of the steps:
- Call for Help: Before you start, ensure someone has called emergency services. Time is of the essence!
- Check Responsiveness: Gently shake the person and shout, “Are you okay?” If there's no response, proceed to the next step.
- Open the Airway: Tilt the head back slightly and lift the chin to open the airway.
- Check for Breathing: Look, listen, and feel for breathing. If the person is not breathing or only gasping, begin CPR.
- Chest Compressions: Place the heel of one hand on the center of the chest, interlock your fingers, and push down hard and fast—at least 100 to 120 compressions per minute.
- Rescue Breaths: After every 30 compressions, give 2 rescue breaths if trained to do so. Pinch the nose, cover the mouth, and breathe into the person’s mouth until you see the chest rise.
It's important to remember that CPR can be performed without rescue breaths, known as hands-only CPR, which is particularly effective for adults. This method focuses solely on chest compressions, allowing you to keep the blood circulating without the need for mouth-to-mouth contact. If you’re ever in doubt, just keep those compressions going!
Every second counts during a cardiac arrest. The longer a person goes without CPR, the higher the risk of irreversible brain damage or death. That's why having the confidence to perform CPR can make a world of difference. You don't need to be a medical professional; just a willing bystander can save a life. So, take the time to learn this skill, practice it, and be ready to act. You might just be the hero someone needs in their moment of crisis.
In addition to knowing how to perform CPR, it’s crucial to recognize the signs of cardiac arrest. This knowledge can empower you to act quickly and decisively. The signs include:
| Sign | Description |
|---|---|
| Unresponsiveness | The person does not respond to shaking or shouting. |
| No Breathing | The person is not breathing or is gasping. |
| Pale or Bluish Skin | The skin may appear pale or have a bluish tint, indicating a lack of oxygen. |
In conclusion, learning CPR is not just a skill; it's a responsibility. By being prepared and knowledgeable, you can be the difference between life and death for someone in need. So, take that leap—sign up for a CPR course, practice regularly, and spread the word. You never know when you might need to step in and save a life!

Recognizing Cardiac Arrest
Recognizing cardiac arrest is crucial because every second counts in these life-threatening situations. Imagine being in a crowded place, and suddenly someone collapses. Your ability to quickly identify the signs of cardiac arrest can mean the difference between life and death. So, what should you look for? The primary indicators include:
- Unresponsiveness: The person does not respond when you shake them or shout.
- No Breathing: They are not breathing or are gasping for air.
- Pale or Bluish Skin: The skin may appear pale or take on a bluish tint, especially around the lips and fingertips.
When these signs are present, it’s essential to act swiftly. Cardiac arrest can occur due to various reasons, such as heart disease, trauma, or even severe allergic reactions. Understanding these signs can empower you to initiate lifesaving measures, like calling emergency services and starting CPR.
To further illustrate the importance of recognizing cardiac arrest, let’s consider a scenario. You’re at a family gathering when you notice your uncle suddenly slumping over in his chair. At first, it might seem like he’s just dozing off, but upon closer inspection, you find he’s unresponsive and not breathing. This is the moment where your awareness and quick thinking can save a life. By immediately calling for help and starting CPR, you give him a fighting chance while waiting for professional medical assistance.
In summary, recognizing cardiac arrest involves being vigilant and aware of the signs. The faster you can identify these symptoms, the quicker you can respond and potentially save a life. Remember, your actions in those critical moments can make all the difference.

Performing CPR on Adults and Children
When it comes to performing CPR, understanding the differences between adults and children is crucial. While the fundamental principles of CPR remain the same, the techniques and approaches vary significantly due to the anatomical and physiological differences between these age groups. Imagine being a superhero, ready to save a life, but knowing the right moves to make can be the difference between success and failure. So, let’s break it down!
For adults, the CPR technique primarily involves chest compressions and rescue breaths. The American Heart Association recommends using the "30:2" ratio, which means you should deliver 30 chest compressions followed by 2 rescue breaths. The compressions should be hard and fast, at a rate of 100 to 120 compressions per minute, aiming for a depth of about 2 to 2.4 inches. Think of it as a rhythmic dance, where every beat counts towards bringing someone back to life!
On the other hand, when performing CPR on children, the approach slightly changes. For children aged 1 to puberty, the compression-to-breath ratio remains the same at 30:2 if you're alone, but if you have someone assisting you, it changes to 15:2. The depth of compressions should be about 1.5 inches, which is significantly shallower than for adults. It’s like adjusting your power level when using a remote control; you need to dial it back a bit to suit the situation.
For infants under the age of 1, the technique changes again. Use two fingers for chest compressions and perform them at a depth of about 1.5 inches, at a rate of 100 to 120 compressions per minute. The ratio of compressions to breaths remains at 30:2 if you're alone, but again, it shifts to 15:2 with a partner. Remember, the breaths for infants should be gentle—just enough to see the chest rise. It’s like blowing up a balloon; you want to be careful not to pop it!
Here’s a quick comparison for your reference:
| Age Group | Compression Depth | Compression Rate | Compression to Breaths Ratio |
|---|---|---|---|
| Adults | 2 to 2.4 inches | 100 to 120/min | 30:2 |
| Children (1 to puberty) | 1.5 inches | 100 to 120/min | 30:2 (1 rescuer), 15:2 (2 rescuers) |
| Infants (under 1) | 1.5 inches | 100 to 120/min | 30:2 (1 rescuer), 15:2 (2 rescuers) |
In conclusion, while the core of CPR remains consistent, adapting your technique based on the age of the person in distress is essential. It’s not just about knowing how to perform CPR; it’s about understanding the nuances that can make all the difference in a life-or-death situation. So, arm yourself with this knowledge and be ready to step in as a lifesaver when it counts!
Q: How often should I practice CPR?
A: It's recommended to refresh your CPR skills every two years through a certified course to stay updated on the latest techniques and guidelines.
Q: Can I perform CPR if I'm not trained?
A: Yes! If you're untrained, you can still perform hands-only CPR, which focuses on chest compressions without rescue breaths. Call 911 and push hard and fast in the center of the chest.
Q: What if I am afraid of hurting the person?
A: It's natural to feel apprehensive, but remember that the risk of not performing CPR is greater than the risk of potential injury. You could save a life!

Wound Care Techniques
When it comes to wound care, understanding the proper techniques can make all the difference in preventing infection and ensuring a smooth healing process. Whether it's a minor cut or a more serious laceration, the steps you take immediately after an injury can significantly impact recovery. The first thing you should do is assess the wound. Is it bleeding? Is it deep? These questions will guide your next steps. If the bleeding is severe, applying direct pressure with a clean cloth or bandage is essential. Remember, your goal is to stop the bleeding while keeping the wound clean.
Once you've managed any bleeding, the next step is to clean the wound. Rinse it gently under running water to remove dirt and debris. Avoid using harsh soaps or antiseptics directly on the wound, as these can irritate the tissue. Instead, you might want to use a saline solution or a mild soap around the area. After cleaning, pat the wound dry with a clean towel or gauze. This step is crucial because moisture can foster bacteria growth, leading to infections.
After the wound is clean and dry, it's time to dress it properly. Applying a sterile bandage or dressing not only protects the wound from further injury but also keeps it moist, which is crucial for healing. Depending on the size and location of the wound, you may choose from various dressing options:
| Dressing Type | Best For |
|---|---|
| Adhesive Bandages | Small cuts and abrasions |
| Gauze Pads | Medium to large wounds |
| Hydrocolloid Dressings | Blisters and minor burns |
| Antimicrobial Dressings | Wounds at risk for infection |
After applying a dressing, monitor the wound regularly for signs of infection, such as increased redness, swelling, warmth, or discharge. If you notice any of these symptoms, it’s best to consult a healthcare professional. Additionally, changing the dressing regularly—at least once a day or whenever it becomes wet or dirty—is vital in maintaining a clean environment for healing.
Lastly, keep in mind that some wounds may require stitches or professional medical attention, especially if they are deep or won't stop bleeding. Always trust your instincts; if something feels off, don’t hesitate to seek help. Proper wound care is not just about immediate treatment; it's also about understanding when to escalate care for optimal recovery.
- How often should I change a wound dressing? It's generally recommended to change the dressing at least once a day or whenever it becomes wet or dirty.
- What should I do if my wound starts to bleed again? Apply gentle pressure with a clean cloth or bandage until the bleeding stops. If it doesn’t stop after 10 minutes, seek medical attention.
- When should I see a doctor for a wound? You should see a doctor if the wound is deep, won’t stop bleeding, shows signs of infection, or if you are unsure about how to care for it.

Assembling a First Aid Kit
Creating a well-stocked first aid kit is an essential step in preparing for medical emergencies. Think of it as your personal safety net, ready to catch you when life throws unexpected challenges your way. Whether it’s a minor cut, a sprained ankle, or a more severe incident, having the right supplies on hand can make all the difference in providing immediate care.
When assembling your first aid kit, consider the types of injuries or emergencies you might encounter based on your lifestyle. For instance, if you’re an avid hiker, you might want to include items specifically designed for outdoor injuries, while a family with young children might focus on supplies for common childhood ailments. The goal is to be prepared for anything that might come your way. Here are some essential items that should be included in every first aid kit:
- Adhesive bandages in various sizes
- Gauze pads and adhesive tape
- Antiseptic wipes or solution
- Scissors and tweezers
- Instant cold packs
- Pain relievers like ibuprofen or acetaminophen
- Burn cream or gel
- Disposable gloves
- CPR face shield
But don’t just stop at the basics! It’s crucial to customize your kit to suit your specific needs. For example, if you or a family member has allergies, include an epinephrine auto-injector. If you have pets, consider adding supplies to care for them in case of an emergency. The first aid kit should reflect your lifestyle and the potential risks you face.
Regular maintenance of your first aid kit is just as important as assembling it. Over time, items can expire or become used up, so it’s vital to check your kit every few months. Make a habit of reviewing the contents—replace any expired medications and ensure that all items are in good condition. This simple practice ensures that when an emergency strikes, you won’t find yourself scrambling to find a crucial item that’s no longer usable.
In summary, assembling a first aid kit is not just about throwing a few items in a box. It’s about being proactive and prepared. By considering your unique circumstances and keeping your kit well-maintained, you can provide effective care when it matters most. Remember, in the world of emergencies, being prepared is half the battle won!
Q: How often should I check my first aid kit?
A: It’s recommended to check your first aid kit every 3-6 months to replace expired items and ensure everything is in good condition.
Q: Can I use a regular bag for my first aid kit?
A: Yes, any sturdy bag can work, but consider using a bag that is clearly labeled and easy to carry, especially in emergencies.
Q: Where should I keep my first aid kit?
A: Store your first aid kit in a cool, dry place that is easily accessible to all family members. Consider having multiple kits for different locations, like your home, car, and workplace.

Customizing Your First Aid Kit
When it comes to first aid kits, one size does not fit all. Customizing your first aid kit is an essential step in ensuring that you are fully prepared for any medical emergency that may arise. Think of your first aid kit as a toolbox; just like a carpenter wouldn’t carry only a hammer, you shouldn’t rely on a generic kit that may not meet your unique needs. Whether you’re a parent, an athlete, or someone who enjoys outdoor adventures, tailoring your kit can make all the difference in critical moments.
Start by assessing your specific circumstances and the activities you engage in regularly. For instance, if you have young children, consider including items specifically designed for pediatric care, such as child-sized bandages and dosages of liquid medications. If you’re an outdoor enthusiast, you might want to add items like insect repellent, sunscreen, and supplies for treating snake bites or other wildlife-related injuries.
Additionally, think about any pre-existing health conditions that you or your family members might have. If someone has allergies, ensure you have antihistamines and an epinephrine auto-injector on hand. For those with chronic conditions like asthma, include inhalers and spacer devices. Keeping a list of these specific needs can help you remember what to include in your kit.
Here’s a quick table to give you an idea of how to customize your first aid kit based on different scenarios:
| Scenario | Suggested Items |
|---|---|
| Family with Children | Child-sized bandages, liquid pain relievers, thermometer, pediatric CPR instructions |
| Outdoor Activities | Insect repellent, sunscreen, snake bite kit, emergency blanket |
| Sports Enthusiasts | Elastic bandages, ice packs, splints, blister treatment |
| Traveling | Antiseptic wipes, motion sickness tablets, travel-sized medications |
Once you’ve identified the items you need, it’s crucial to organize your first aid kit efficiently. Place frequently used items, like adhesive bandages and antiseptic wipes, at the top or in an easily accessible pocket. This way, during an emergency, you won’t waste precious seconds searching for what you need.
Lastly, don’t forget to review and update your kit regularly. As your family grows or your activities change, your first aid needs will evolve too. Set a reminder every six months to check the contents of your kit, replacing any expired items and adding new supplies as needed. A well-customized and maintained first aid kit can be your best ally in emergencies, so take the time to make it right!
- How often should I check my first aid kit? It's recommended to review your first aid kit every six months to ensure that all items are current and in good condition.
- Can I include medications in my first aid kit? Yes, but be sure to check expiration dates regularly and include any necessary prescriptions for family members.
- What should I do if I use an item from my first aid kit? Replace it as soon as possible to ensure your kit is ready for future emergencies.
- Is it okay to have multiple first aid kits? Absolutely! Having kits in different locations, such as your home, car, and workplace, can enhance your preparedness.

Maintenance and Regular Checks
Maintaining your first aid kit is just as crucial as assembling it in the first place. Imagine this: you’re in the middle of a medical emergency, and you reach for your first aid kit only to find that some supplies are expired or missing. It’s a frustrating scenario that can easily be avoided with a little diligence. Regular checks of your first aid kit ensure that you are always prepared to handle any situation that may arise. So, how often should you conduct these checks? Ideally, you should review your kit every six months, but there are certain circumstances that may warrant more frequent inspections.
During these maintenance checks, you should look for a few key things. First, check the expiration dates on all medications and supplies. Items like antiseptics, ointments, and even certain types of bandages can lose their effectiveness over time. If you find anything that’s past its prime, it’s time to replace it. Additionally, make sure that you have enough of each item. If you’ve used your kit recently, you might find that items like adhesive bandages or gauze pads are running low. Keeping a checklist can be a handy way to track what you have and what you need to replenish.
Here’s a simple checklist to guide your maintenance routine:
- Check expiration dates on medications and supplies.
- Restock any used items.
- Inspect for any damage to the kit itself.
- Ensure that all items are clean and properly stored.
Moreover, consider customizing your first aid kit based on seasonal activities or specific health concerns within your family. For instance, if you’re planning a hiking trip, you might want to include additional supplies for treating insect bites or scrapes. On the other hand, if someone in your household has allergies, make sure to have antihistamines readily available. By tailoring your kit, you can ensure that it meets your unique needs and is always ready for action.
In conclusion, the key to effective first aid preparedness lies in the maintenance and regular checks of your kit. By making it a habit to inspect your supplies, you’ll not only ensure that you’re fully equipped to handle emergencies, but you’ll also give yourself peace of mind. Remember, being proactive today can make all the difference tomorrow!
Q: How often should I check my first aid kit?
A: It’s recommended to check your first aid kit every six months, or more frequently if you’ve used it recently.
Q: What should I do if I find expired items in my kit?
A: Replace any expired items immediately to ensure that your kit is effective during an emergency.
Q: Can I customize my first aid kit?
A: Absolutely! Customize your kit based on your family’s specific health needs and the activities you participate in.
Q: What are some essential items to include in a first aid kit?
A: Essential items include adhesive bandages, antiseptic wipes, gauze pads, medical tape, scissors, and any necessary medications.
Frequently Asked Questions
- What should I do in a medical emergency?
In a medical emergency, the first step is to remain calm. Assess the situation and call for help if needed. If someone is unconscious or not breathing, start CPR immediately. Always remember to prioritize safety and act quickly!
- How can I recognize a cardiac arrest?
Cardiac arrest can be identified by the sudden loss of responsiveness and abnormal or absent breathing. If you see someone collapse, check for these signs. Time is critical, so don’t hesitate to call emergency services and begin CPR if necessary.
- What are the essential skills I need for first aid?
Key first aid skills include CPR, wound care, and recognizing signs of choking. Knowing how to perform these techniques can significantly increase someone’s chances of survival in an emergency. Consider taking a first aid course for hands-on practice!
- How do I assemble a first aid kit?
To assemble a first aid kit, include items like adhesive bandages, antiseptic wipes, gauze, scissors, and a CPR mask. Tailor the kit to your specific needs, considering any personal or family health concerns. Regularly check and replenish supplies!
- How often should I check my first aid kit?
It’s a good idea to check your first aid kit at least once every six months. Look for expired items and replace any used supplies. Keeping your kit up to date ensures that you’re always ready for any emergency that may arise.
- Can I use my first aid kit for pets?
Yes, you can use some items from your first aid kit for pets, but it's essential to have a separate kit specifically for them. Include pet-specific supplies like a muzzle, tweezers for splinters, and a pet first aid manual to guide you in emergencies involving animals.
- What should I do if I encounter an allergic reaction?
If someone is having an allergic reaction, especially if they are experiencing difficulty breathing or swelling, call emergency services immediately. If they have an epinephrine auto-injector (like an EpiPen), assist them in using it right away. Time is of the essence!


